Red, White and Blue Dirt Cups
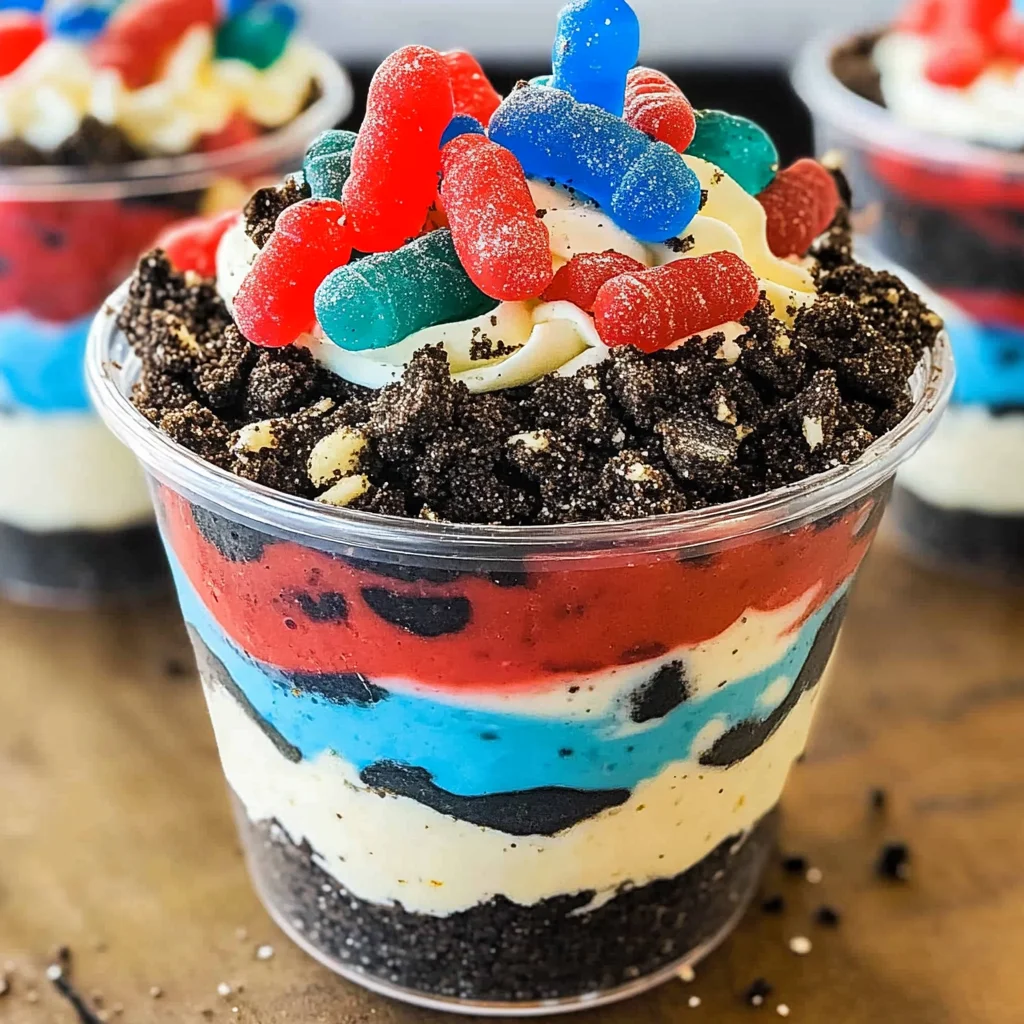
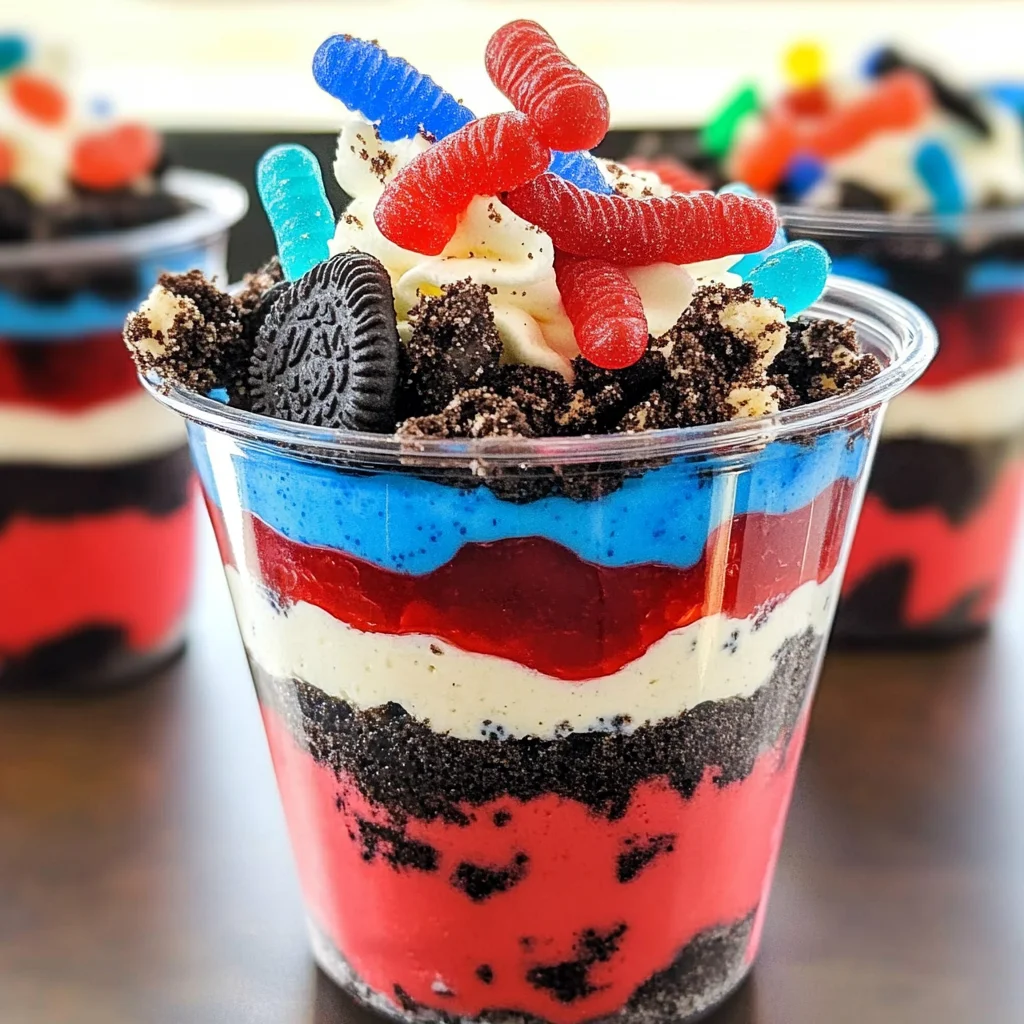
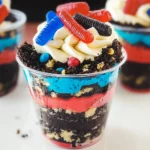
Easy no-bake Red, White and Blue Dirt Cups are a delightful summer dessert perfect for any celebration. These charming cups feature layers of creamy cheesecake pudding, crushed Oreos, and colorful pectin-based gummy candies. Great for kids and adults alike, these dirt cups make an eye-catching addition to your 4th of July festivities or any other summer gathering!
Why You’ll Love This Recipe
- No-Bake Convenience: These dirt cups are incredibly easy to prepare, making them ideal for last-minute dessert needs.
- Fun and Festive: The vibrant colors and playful presentation make these cups a hit at parties and gatherings.
- Kid-Friendly: Kids will love helping assemble the layers, making this an engaging activity for families.
- Rich Flavor: Combining cheesecake pudding with Oreo cookies creates a deliciously creamy and crunchy treat.
- Versatile Treat: Easily adapt ingredients to suit your taste preferences or dietary needs while retaining the festive theme.
Tools and Preparation
Before diving into the recipe, gather your tools to ensure a smooth preparation process.
Essential Tools and Equipment
- Mixing bowl
- Whisk
- Plastic cups
- Spoon or spatula
Importance of Each Tool
- Mixing bowl: A large bowl is essential for combining the pudding and milk effectively.
- Whisk: This tool helps achieve a smooth pudding texture by thoroughly mixing the ingredients without lumps.
- Plastic cups: They provide a fun way to serve individual portions while showcasing the colorful layers.
- Spoon or spatula: Ideal for layering ingredients neatly in the cups.
Ingredients
To create these delightful Red, White and Blue Dirt Cups, you’ll need the following ingredients:
For the Pudding Layers
- 2 boxes cheesecake pudding (3.4 ounces each)
- 4 cups milk
For the Oreo Layers
- 19 Oreo cookies (crushed)
For Colorful Decoration
- ¼ teaspoon red gel food dye
- ¼ teaspoon blue gel food dye
- 8 red and blue pectin-based gummy candies
How to Make Red, White and Blue Dirt Cups
Step 1: Prepare the Pudding
- Place both boxes of pudding in a large mixing bowl.
- Add the milk and whisk until the pudding thickens.
Step 2: Color the Pudding
- Separate the pudding into two bowls: one with 1 cup of pudding, another with 1 ½ cups.
- In the first bowl with 1 cup pudding, add blue dye until well mixed.
- In the second bowl with 1 ½ cups pudding, add red dye until thoroughly combined.
Step 3: Assemble Your Cups
- Line up your plastic cups on a clean surface.
- Start by adding 1 tablespoon of crushed Oreos to each cup as the base layer.
- On top of that, gently place 2 tablespoons of blue pudding in each cup and spread evenly.
- Add another tablespoon of crushed Oreos as the next layer.
- Follow with 3 tablespoons of white pudding spread evenly over the Oreos.
- Add another layer of just over 1 tablespoon of white pudding.
- Next, place 4 tablespoons of red pudding as another layer in each cup.
- For the final touch, add another 2 tablespoons of crushed Oreos on top.
Step 4: Garnish Your Creation
- Top each cup with two pectin-based gummy candies and one small flag for decoration.
Enjoy your deliciously festive Red, White and Blue Dirt Cups!
How to Serve Red, White and Blue Dirt Cups
Serving Red, White and Blue Dirt Cups can elevate any summer gathering or festive celebration. These vibrant treats are not only delicious but also visually appealing, making them a hit among both kids and adults.
Individual Portions
- These cups are perfect for individual servings, allowing everyone to enjoy their own festive treat without sharing.
Garnished with Fresh Berries
- Top each cup with fresh strawberries or blueberries for an extra burst of flavor and a touch of freshness.
Festive Party Table Display
- Arrange the cups on a colorful tablecloth. Add decorative elements like mini flags or themed napkins to enhance the festive look.
Kids’ Birthday Parties
- These dirt cups are an excellent addition to children’s birthday parties. Their bright colors and fun layers will delight young guests.
Outdoor Picnics
- Pack these cups in a cooler for outdoor gatherings. They are easy to transport and serve, making them perfect for picnics.
Family Movie Night Treats
- Serve these dirt cups as a sweet treat during family movie nights. They pair well with popcorn for a delightful snack combo.
How to Perfect Red, White and Blue Dirt Cups
To ensure your Red, White and Blue Dirt Cups turn out perfectly every time, consider these simple tips.
-
Use Cold Milk: Starting with cold milk helps the pudding thicken more quickly and gives it a better texture.
-
Crush Oreos Finely: For a smoother layer, crush the Oreos into fine crumbs before adding them to the cups.
-
Layer Carefully: To maintain distinct layers, add each layer slowly and gently spread it evenly within the cup.
-
Chill Before Serving: Letting the assembled cups chill in the refrigerator for at least 30 minutes enhances their flavor and texture.
-
Customize Colors: Feel free to adjust the amount of food dye based on your preference for more vibrant colors.
-
Experiment with Toppings: Try adding whipped cream or other fruity toppings for varied textures and flavors.
Best Side Dishes for Red, White and Blue Dirt Cups
Pairing side dishes with your Red, White and Blue Dirt Cups can create a delightful meal experience. Here are some great options that complement these sweet treats perfectly.
-
Grilled Chicken Skewers: Marinated chicken grilled on skewers provides a savory contrast to the sweetness of the dirt cups.
-
Vegetable Platter: A mix of colorful veggies served with hummus offers a healthy crunch alongside your dessert.
-
Caprese Salad: Fresh mozzarella, tomatoes, and basil drizzled with balsamic vinegar create a refreshing side that pairs well with dessert.
-
Corn on the Cob: Grilled or boiled corn brushed with butter adds sweetness while complementing the patriotic theme.
-
Fruit Salad: A vibrant mix of seasonal fruits can balance out the sweetness of the dirt cups while adding brightness to your table.
-
Pasta Salad: A light pasta salad with fresh vegetables is satisfying without overpowering the dessert’s flavors.
-
Potato Chips: Offering crunchy potato chips can provide an unexpected salty contrast that is always popular at gatherings.
-
Cheese Board: A selection of cheeses adds sophistication while providing savory bites that pair beautifully after dessert.
Common Mistakes to Avoid
When making Red, White and Blue Dirt Cups, there are a few common mistakes that can affect the final result.
- Skipping the chilling time: Not allowing the pudding to chill before layering can lead to a runny texture. Always refrigerate until it firms up.
- Overmixing the dyes: Mixing too vigorously when adding food dye can cause the pudding to become thin. Stir gently to maintain the pudding’s creamy consistency.
- Incorrect layering: If you don’t layer the ingredients carefully, the layers may blend together. Use precise measurements for each layer to keep them distinct.
- Using too many gummy candies: Overloading on gummy candies can overwhelm the dessert. Stick to the recommended amount for balance in flavor and decoration.
- Neglecting cup size: Using cups that are too small may lead to overflowing layers. Choose appropriately sized cups to showcase all your hard work.
- Not crushing Oreos finely enough: Large chunks of Oreos won’t create a smooth layer. Crush them into fine pieces for a better presentation and texture.
Storage & Reheating Instructions
Refrigerator Storage
- Store in airtight containers for up to 3 days.
- Ensure each cup is covered tightly to prevent drying out.
Freezing Red, White and Blue Dirt Cups
- Freeze for up to 1 month if you want to keep them longer.
- Use freezer-safe containers or wrap tightly in plastic wrap.
Reheating Red, White and Blue Dirt Cups
- Oven: Preheat oven to 350°F and warm cups for about 10 minutes. This method is not commonly used since they are typically served cold.
- Microwave: Heat on low power for 15-20 seconds if desired slightly softened. Be careful not to overheat.
- Stovetop: This method is not recommended as it may alter the dessert’s texture.
Frequently Asked Questions
Here are some common questions about Red, White and Blue Dirt Cups that might help you.
What are Red, White and Blue Dirt Cups?
Red, White and Blue Dirt Cups are fun layered desserts made with cheesecake pudding, crushed Oreo cookies, and colorful layers representing red, white, and blue.
How long do Red, White and Blue Dirt Cups last?
These delicious cups can last up to 3 days in the refrigerator when stored properly in airtight containers.
Can I customize my Red, White and Blue Dirt Cups?
Absolutely! You can add different fruits or use alternative toppings like whipped cream or sprinkles for variety.
Are there any alternatives for the pudding mix?
Yes! You can use vanilla or chocolate pudding if you’re looking for a different flavor profile while keeping with the same layering concept.
Final Thoughts
Red, White and Blue Dirt Cups make an outstanding dessert for summer gatherings and holidays like Independence Day. Their vibrant colors and delightful flavors will impress both kids and adults alike! Feel free to customize these cups by adding your favorite toppings or using different colors of food dye—your creativity is your only limit!
Red, White and Blue Dirt Cups
Indulge in the festive spirit with these delightful Red, White and Blue Dirt Cups! Perfect for summer celebrations, these easy-to-make no-bake desserts are layered with creamy cheesecake pudding, crunchy crushed Oreos, and colorful pectin-based gummy candies. With their vibrant hues and playful presentation, these cups are sure to be a hit at any gathering—from Fourth of July parties to family picnics. Not only are they visually appealing, but they’re also a fun activity for kids to help assemble. Enjoy this refreshing treat that embodies the essence of summer!
- Prep Time: 20 minutes
- Cook Time: N/A
- Total Time: 0 hours
- Yield: Serves approximately 6 cups 1x
- Category: Dessert
- Method: No-bake
- Cuisine: American
Ingredients
- 2 boxes cheesecake pudding (3.4 ounces each)
- 4 cups milk
- 19 Oreo cookies (crushed)
- ¼ teaspoon red gel food dye
- ¼ teaspoon blue gel food dye
- 8 red and blue pectin-based gummy candies
Instructions
- In a large mixing bowl, combine both boxes of cheesecake pudding with the cold milk. Whisk until thickened.
- Divide the pudding into two bowls: one with 1 cup and the other with 1½ cups. Add blue dye to the first bowl and mix well; add red dye to the second bowl until fully combined.
- Layer your cups by starting with 1 tablespoon of crushed Oreos in each cup, followed by 2 tablespoons of blue pudding, another tablespoon of crushed Oreos, and then 3 tablespoons of white pudding.
- Add another layer of just over 1 tablespoon of white pudding before topping off with 4 tablespoons of red pudding and finishing it off with an additional 2 tablespoons of crushed Oreos.
- Garnish each cup with two pectin-based gummy candies and a small decorative flag.
Nutrition
- Serving Size: 1 cup (150g)
- Calories: 250
- Sugar: 18g
- Sodium: 210mg
- Fat: 10g
- Saturated Fat: 5g
- Unsaturated Fat: 4g
- Trans Fat: 0g
- Carbohydrates: 36g
- Fiber: 1g
- Protein: 4g
- Cholesterol: 15mg