spooky mummy brownies
The spooky mummy brownies are a delightful treat that’s perfect for Halloween or any festive occasion. These adorable treats not only bring a fun, spooky vibe to your dessert table but also provide rich chocolatey goodness in every bite. Enjoy making them with family and friends for a fun baking experience!
Why You’ll Love This Recipe
- Easy to Make: With simple ingredients and straightforward steps, these brownies are accessible for bakers of all skill levels.
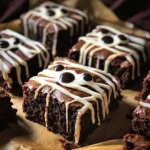
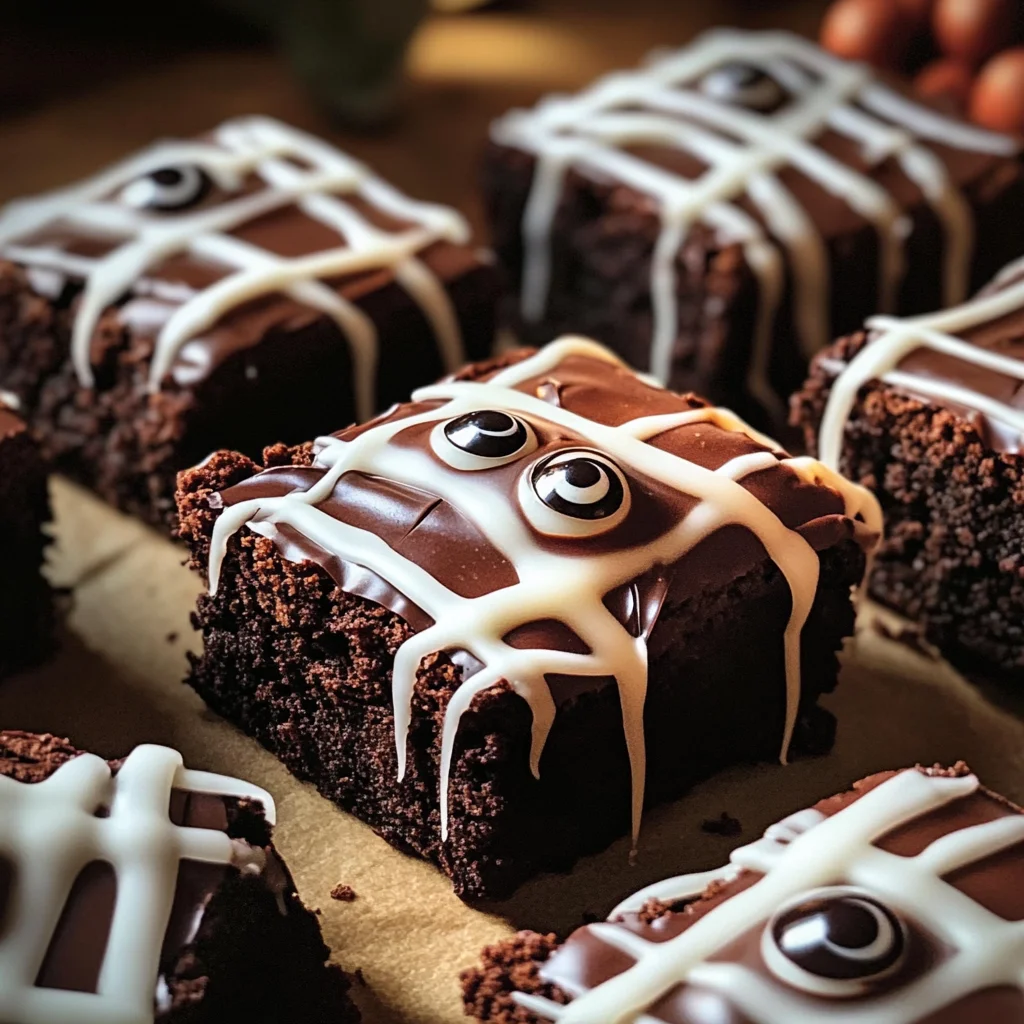
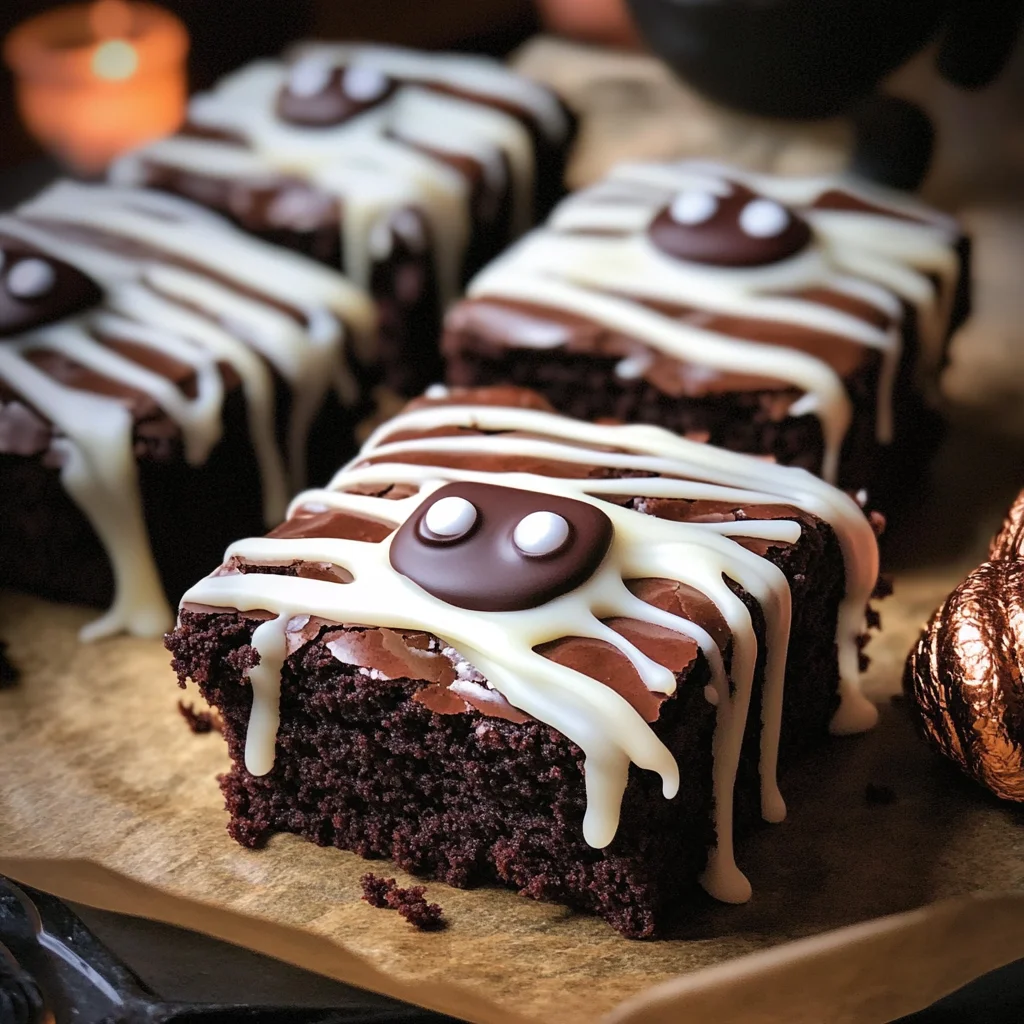
- Cute Presentation: Decorated like mummies with candy eyes, these brownies are sure to impress at any gathering.
- Versatile Flavor: Rich chocolate flavor combined with a creamy coating makes them irresistibly delicious.
- Kid-Friendly Fun: Kids will love helping decorate these spooky treats, making them perfect for family bonding time.
- Great for Sharing: Cut into generous squares, they are ideal for sharing at parties or potlucks.
Tools and Preparation
Before diving into the recipe, gather the necessary tools to streamline your baking process. Having the right equipment can make all the difference!
Essential Tools and Equipment
- 9 x 9 inch cake pan
- Parchment paper
- Microwave-safe bowl
- Stand mixer (or hand mixer)
- Spatula
- Baking sheet
- Ziptop bag or pastry bag
Importance of Each Tool
- Stand mixer: Ideal for achieving the perfect frothy eggs and smooth batter without much effort.
- Parchment paper: Prevents sticking and ensures easy removal of brownies from the pan.
- Microwave-safe bowl: Convenient for melting chocolate and butter quickly without burning.
Ingredients
Almost too cute to eat. Honestly, I can’t eat them because they’re way too cute. But so delicious. It’s a moral battle.
Ingredients:
– 10 tbsp butter
– 1 1/2 cups dark chocolate chips or chunks
– 1 cup sugar
– 1/4 cup dark brown sugar
– 3 eggs, at room temperature
– 1 tsp espresso powder (optional)
– 2 tsp vanilla extract
– 3/4 cup all-purpose flour
– 1/3 cup unsweetened cocoa powder
– 1/2 tsp baking powder
– 1/2 tsp kosher salt
– 1 package candy eyes
– 20 oz semi-sweet or milk chocolate chips
– 1 tbsp coconut oil
– 1 cup powdered sugar
– 2-3 tbsp heavy cream, to thin
How to Make spooky mummy brownies
Step 1: Preheat the Oven
Preheat your oven to 350 degrees F. Line a 9 x 9 inch cake pan with parchment paper so that it hangs over the edges. This will help you easily lift out the brownies once they are baked.
Step 2: Melt Butter and Chocolate
In a microwave-safe bowl, heat 1 cup of chocolate chips with the butter for about one minute. Stir until the bowl is no longer warm. If needed, microwave for an additional 20 seconds and stir again until very smooth.
Step 3: Combine with Sugar
Whisk in both sugars (regular and brown) until completely dissolved.
Step 4: Beat Eggs
In the bowl of a stand mixer, vigorously beat the eggs until frothy (about 2–3 minutes). With the mixer running, slowly stream in the chocolate mixture and continue beating until smooth. Add espresso powder (if using) and vanilla extract.
Step 5: Mix Dry Ingredients
To the chocolate mixture, add flour, cocoa powder, baking powder, and salt. Beat until just combined. Gently fold in the remaining half cup of chocolate chips.
Step 6: Bake Brownies
Spread the brownie batter evenly into the prepared baking pan using a spatula. Bake for about 25–30 minutes or until an inserted toothpick emerges with just a few moist crumbs. Let cool before cutting into large squares.
Step 7: Cool Brownies
Once cooled, place brownies in the freezer for about 15 minutes to firm up before coating.
Step 8: Prepare Chocolate Coating
In another microwave-safe bowl, combine semi-sweet or milk chocolate chips with coconut oil. Heat for one minute then stir until smooth; cool for about five minutes before proceeding.
Step 9: Coat Brownies
Remove brownies from freezer and dip each one into melted chocolate using a fork to coat all sides evenly. Allow excess chocolate to drip back into the bowl before placing on a parchment-lined baking sheet.
Step 10: Chill Coated Brownies
Place coated brownies in fridge for about fifteen minutes to set.
Step 11: Make Bandage Icing
For bandage icing, whisk together powdered sugar with heavy cream until you reach a thick yet spreadable consistency similar to Elmer’s glue. Transfer icing into a ziptop bag with one corner snipped off or use a pastry bag.
Step 12: Decorate Mummies
Once brownies have set, draw crisscross patterns on each brownie resembling bandages using your icing. Attach candy eyes while icing is still wet. Let harden for about ten minutes before enjoying your spooky mummy brownies!
How to Serve spooky mummy brownies
spooky mummy brownies are a delightful treat that can be served in various fun and creative ways. Whether for a Halloween party or a cozy family dessert night, these brownies are sure to impress!
Individual Plates
- Serve each brownie on a colorful plate with a drizzle of extra icing for an added touch.
Dessert Buffet
- Create a dessert table with spooky decorations, allowing guests to pick their favorite brownie and other sweet treats.
Party Favors
- Wrap individual spooky mummy brownies in clear cellophane bags tied with festive ribbons to give as party favors.
Themed Dinner Parties
- Pair these brownies with themed dishes like pumpkin soup or ghost-shaped cookies for a cohesive Halloween dinner experience.
Kids’ Party Treats
- Cut the brownies into smaller squares and serve them on fun Halloween-themed plates for children’s parties.
How to Perfect spooky mummy brownies
To ensure your spooky mummy brownies turn out perfectly every time, follow these helpful tips.
- Use room temperature eggs: This will help the batter mix more smoothly and create a better texture.
- Don’t overmix the batter: Mix just until combined after adding the flour to keep the brownies fudgy.
- Check for doneness: Insert a toothpick into the center; it should come out with just a few moist crumbs.
- Cool completely before decorating: Allowing brownies to cool fully ensures that the icing doesn’t melt or slide off.
- Experiment with toppings: Try adding sprinkles or edible glitter on top of the bandages for extra fun!
Best Side Dishes for spooky mummy brownies
Pair your spooky mummy brownies with these tasty side dishes for an unforgettable dessert spread.
- Pumpkin Spice Whipped Cream: A fluffy topping that adds seasonal flavor and pairs beautifully with chocolate.
- Apple Slices with Caramel Dip: Fresh apple slices provide a crunchy contrast to the rich brownie, while caramel adds sweetness.
- Chocolate Mousse Cups: Light and airy mousse can balance the dense brownie texture, creating an elegant dessert pairing.
- Candy Corn Trail Mix: A mix of nuts, chocolate chips, and candy corn offers a festive crunch alongside your brownies.
- Ghostly Marshmallow Pops: Marshmallows dipped in chocolate and decorated like ghosts make for a playful addition to your dessert table.
- Hot Chocolate Bar: Set up a hot chocolate station where guests can customize their drinks with whipped cream, marshmallows, and sprinkles.
Common Mistakes to Avoid
When making spooky mummy brownies, it’s easy to make a few common mistakes. Here are some tips to help you avoid them.
- Boldly skip the cooling time: Cutting into warm brownies can lead to a messy outcome. Allow them to cool completely for clean cuts.
- Boldly ignore ingredient temperature: Using cold eggs or butter can affect the batter’s texture. Ensure all ingredients are at room temperature for the best results.
- Boldly rush the dipping process: Not allowing the chocolate coating to cool slightly can result in it being too runny. Let it sit for a few minutes before dipping the brownies.
- Boldly forget about the icing consistency: If your icing is too thin, it won’t hold its shape. Aim for a thicker consistency, similar to Elmer’s glue, for perfect bandages.
- Boldly overlook storage tips: Storing brownies improperly can lead to dryness. Use airtight containers to keep them fresh longer.
Storage & Reheating Instructions
Refrigerator Storage
- Store in an airtight container for up to 5 days.
- Place parchment paper between layers to prevent sticking.
Freezing spooky mummy brownies
- Wrap each brownie tightly in plastic wrap and place in a freezer-safe bag.
- They can be frozen for up to 3 months.
Reheating spooky mummy brownies
- Oven: Preheat to 350°F, place brownies on a baking sheet, and warm for 10-15 minutes.
- Microwave: Heat on medium power for 10-15 seconds until just warm.
- Stovetop: Place in a covered pan over low heat for about 5 minutes, checking frequently.
Frequently Asked Questions
Here are some common questions about spooky mummy brownies.
Can I customize the toppings on my spooky mummy brownies?
Yes! You can use different candies or sprinkles instead of candy eyes to create your own unique look.
How do I ensure my spooky mummy brownies are fudgy?
Make sure not to overbake them. A toothpick should come out with a few moist crumbs for that fudgy texture.
What if I don’t have dark chocolate chips?
You can substitute with semi-sweet or milk chocolate chips without affecting the overall taste of your spooky mummy brownies.
Can I make these spooky mummy brownies gluten-free?
Absolutely! Substitute all-purpose flour with a gluten-free flour blend and follow the recipe as usual.
How long does it take to make spooky mummy brownies?
The total time is about 90 minutes, including preparation and cooling time.
Can kids help make spooky mummy brownies?
Yes! This recipe is fun and easy enough for kids to join in, especially when decorating with icing and candy eyes.
Final Thoughts
Spooky mummy brownies are not only adorable but also delicious! These treats are perfect for Halloween gatherings or any festive occasion. Feel free to customize them with different toppings or flavors. Give this recipe a try, and delight your friends and family with these scrumptious goodies!
Spooky Mummy Brownies
Delight in these cute and delicious spooky mummy brownies! Perfect for Halloween celebrations—try making them today!
- Prep Time: 30 minutes
- Cook Time: 30 minutes
- Total Time: 1 hour
- Yield: Approximately 18 servings 1x
- Category: Dessert
- Method: Baking
- Cuisine: American
Ingredients
- 10 tbsp butter
- 1 1/2 cups dark chocolate chips
- 1 cup sugar
- 1/4 cup dark brown sugar
- 3 eggs
- 1 tsp espresso powder (optional)
- 2 tsp vanilla extract
- 3/4 cup all-purpose flour
- 1/3 cup unsweetened cocoa powder
- 1/2 tsp baking powder
- 1/2 tsp kosher salt
- 1 package candy eyes
- 20 oz semi-sweet chocolate chips
- 1 tbsp coconut oil
- 1 cup powdered sugar
- 2–3 tbsp heavy cream, to thin
Instructions
- Preheat your oven to 350°F and line a 9 x 9 inch pan with parchment paper.
- In a microwave-safe bowl, melt butter and dark chocolate together until smooth.
- Mix in sugar until fully dissolved.
- Beat eggs until frothy, then combine with chocolate mixture and vanilla extract.
- Fold in flour, cocoa powder, baking powder, and salt until just mixed; add remaining chocolate chips.
- Spread batter in the pan and bake for 25–30 minutes. Cool completely before cutting.
- Freeze brownies for 15 minutes, then coat in melted semi-sweet chocolate using a fork.
- Decorate with icing resembling bandages and attach candy eyes.
Nutrition
- Serving Size: 1 brownie (45g)
- Calories: 220
- Sugar: 22g
- Sodium: 50mg
- Fat: 12g
- Saturated Fat: 7g
- Unsaturated Fat: 4g
- Trans Fat: 0g
- Carbohydrates: 26g
- Fiber: 1g
- Protein: 3g
- Cholesterol: 40mg

